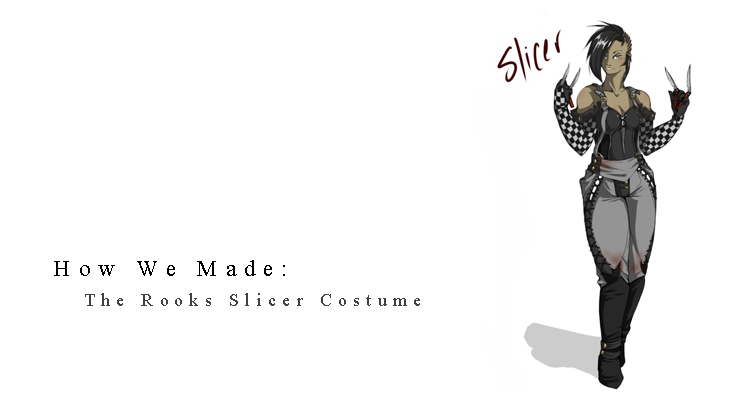
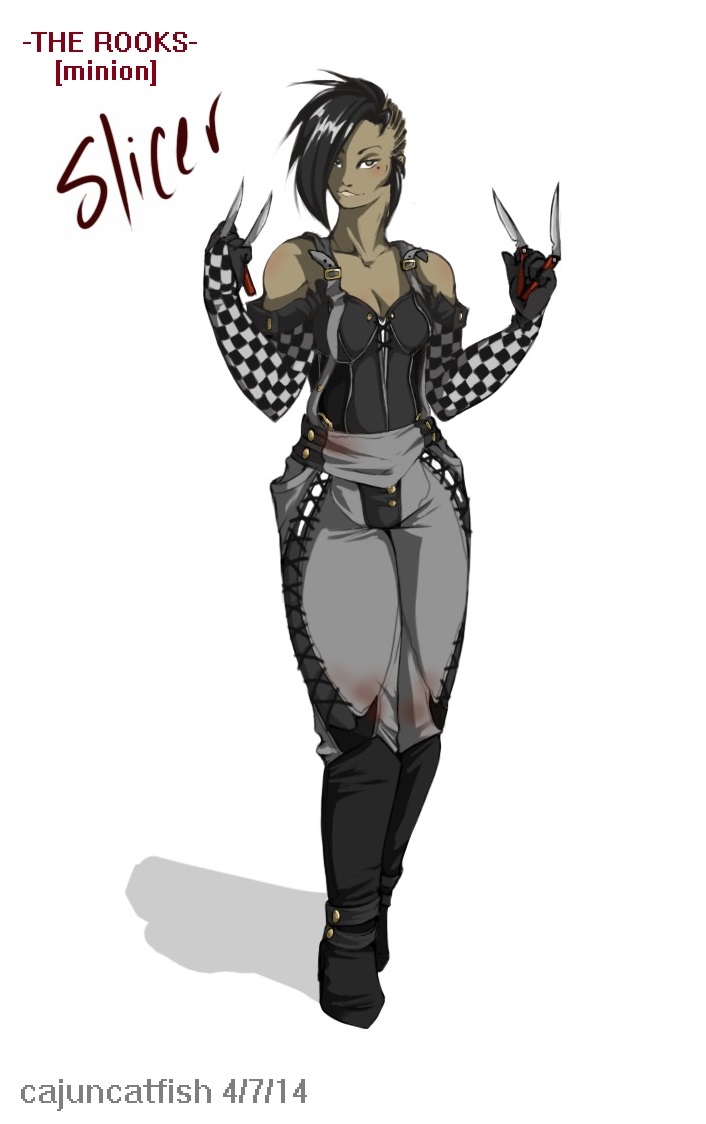
STEP ONE
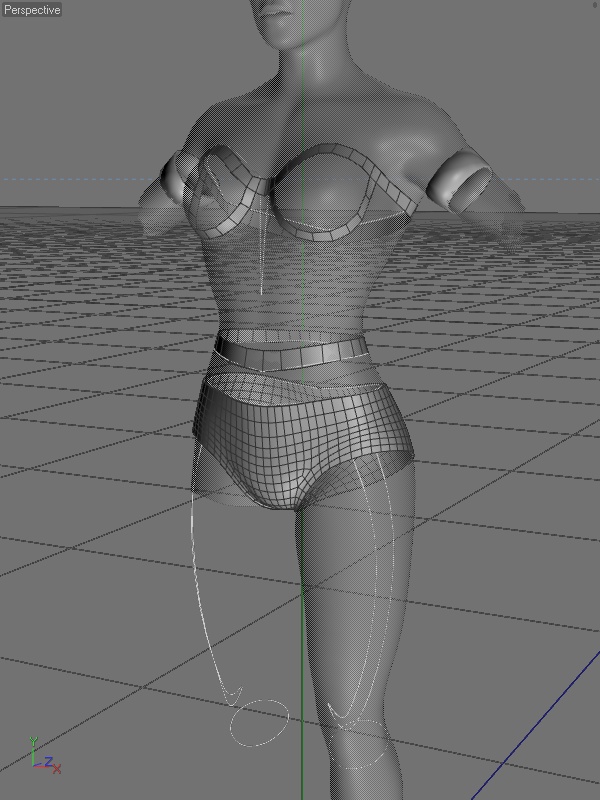
The first step in our modeling process is to get some guide lines for where the important parts of the garment will be. Since many of our garments are closely fitted to the characters, we use surface snapping to basically draw splines (the white lines) on the base character's surface, which can be converted to vertices or strips of polygons if needed, or can simply be used as visual guides.
STEP TWO
Then we build a low-detail mesh that meets the requirements of the garment and fits the character. While there isn't anything wrong with simply copying the base character's mesh and modifying that, in cases where the shape of a garment is different enough, it's better to create new geometry. For example at the border of the pants or the top of the bustier, these areas are quite different from the base character's geometry, so we create new polygons appropriate to the garment.
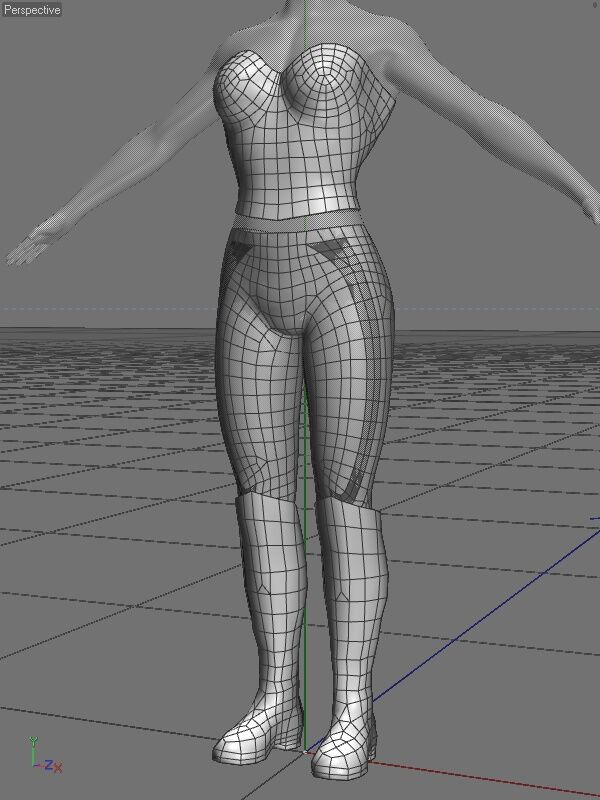
STEP THREE
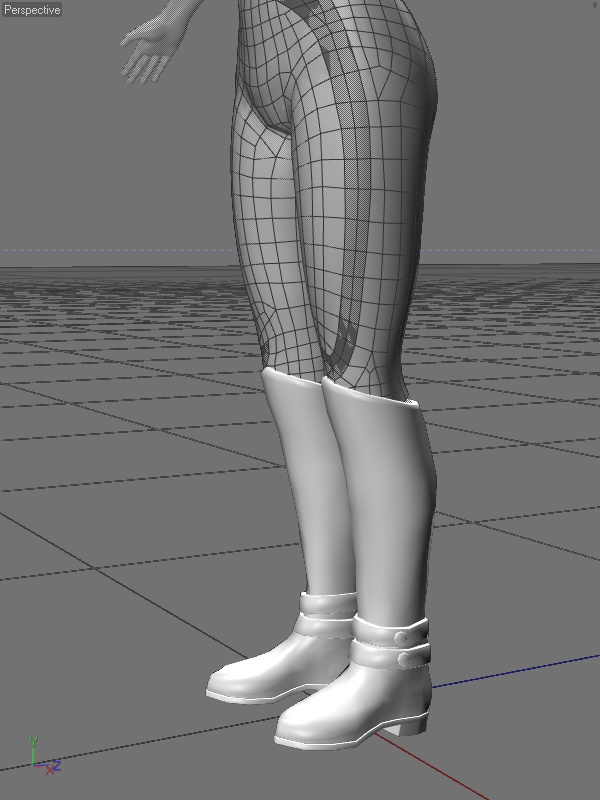
Here are the boots with the polygon detail required for the piece.They aren't textured, which includes a sculpting pass to apply things like wrinkles, creases, wear and tear.
STEP FOUR
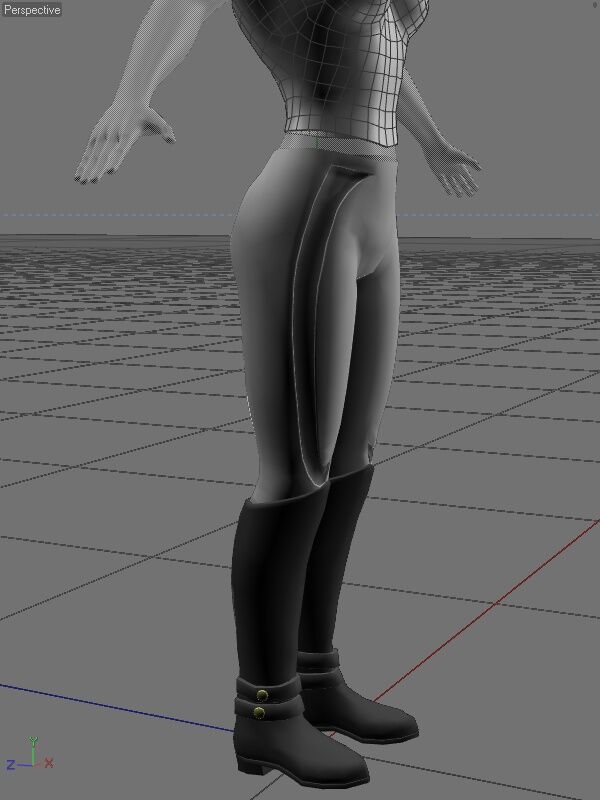
Some more detail on the pants and some basic material selections are set up on the boots.
STEP FIVE

More detailing is done on the pants, and we started a set of suspenders based on the concept art reference.
STEP SIX

More detail for the bustier and suspenders and belt, to match the concept art reference.
STEP SEVEN
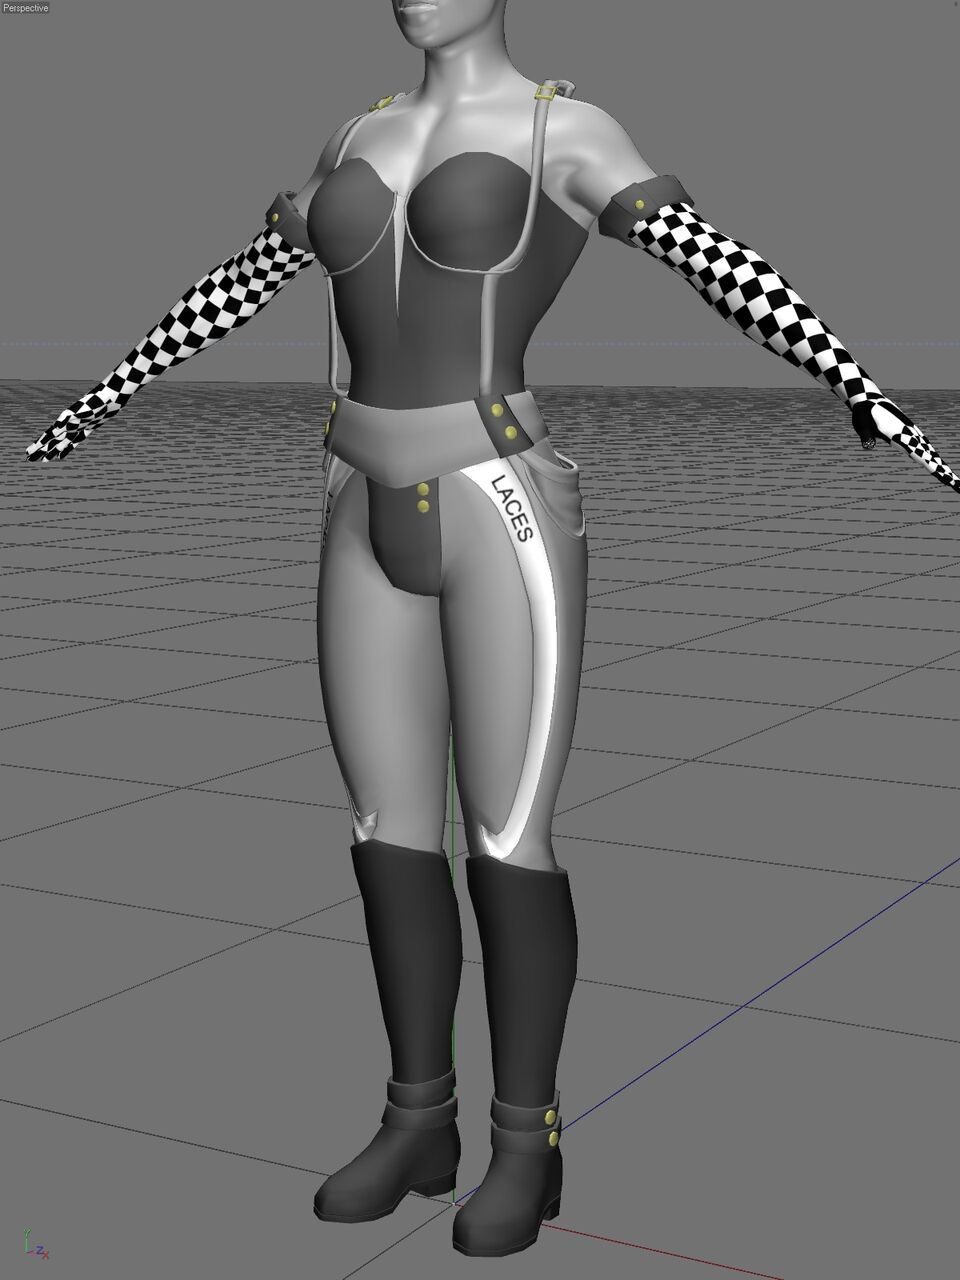
And here is the set with the low poly geometry completed; sculpting of details such as the laces in the pants leg, wrinkles and wear and tear will be done in a later pass. You'll see it all in-game someday.
Credit to Paul 'Fleshforge'
Don't miss City of Titan's first official webcomic, Hijinx!